Guided Product Builder Documentation
Welcome to the Guided Product Builder App documentation!
How to setup Custom Guided Product Builder
How to use Custom Guided Product Builder
Available settings in app
1. Installation
- Redirect After Installation: Upon installation, users are automatically directed to the home page of the Guided Product Builder app.
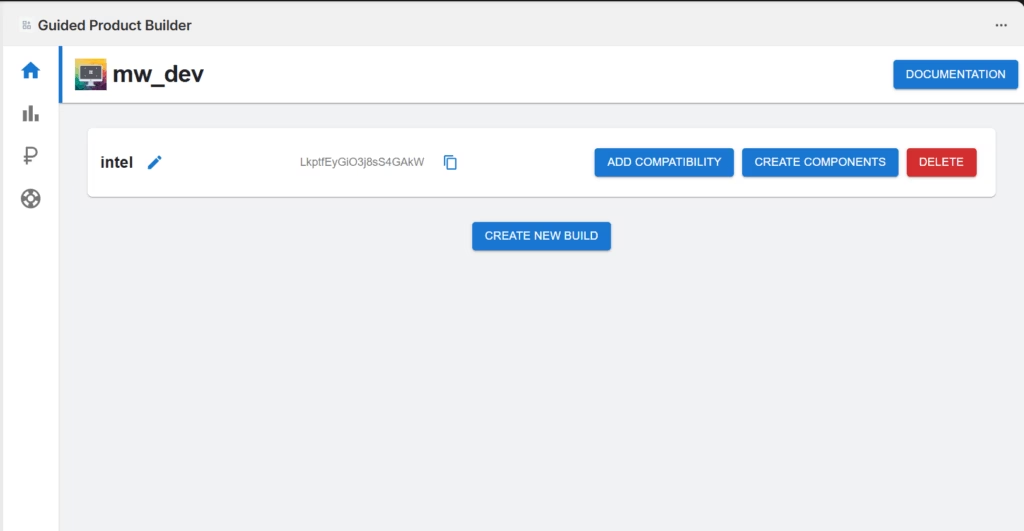
2. Creating a New Guided Product Builder
- Accessing Builder: Navigate to the home page of the app to create a new Guided Product Builder. This feature enables you to build customizable product experiences for any category—such as PCs, electronics, clothing, machinery, footwear, and more.
- Builder ID: Each builder is assigned a unique ID visible on the interface.
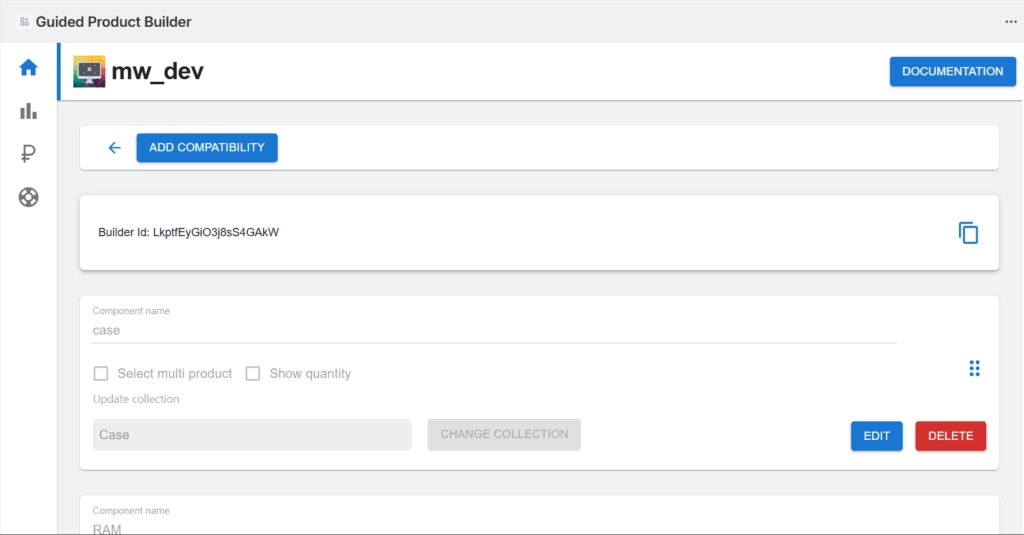
3. Adding Components
- Creating Components: Define custom components like CPU, Case, RAM, etc., and assign them to collections.
- Selecting Collections: Choose collections where related products (e.g., CPUs) are defined.
- Product Configuration:
- Multi-product Selection Option: If selected, users can choose multiple products from one component.
- Quantity Option: If selected, users can specify the quantity of each selected product.
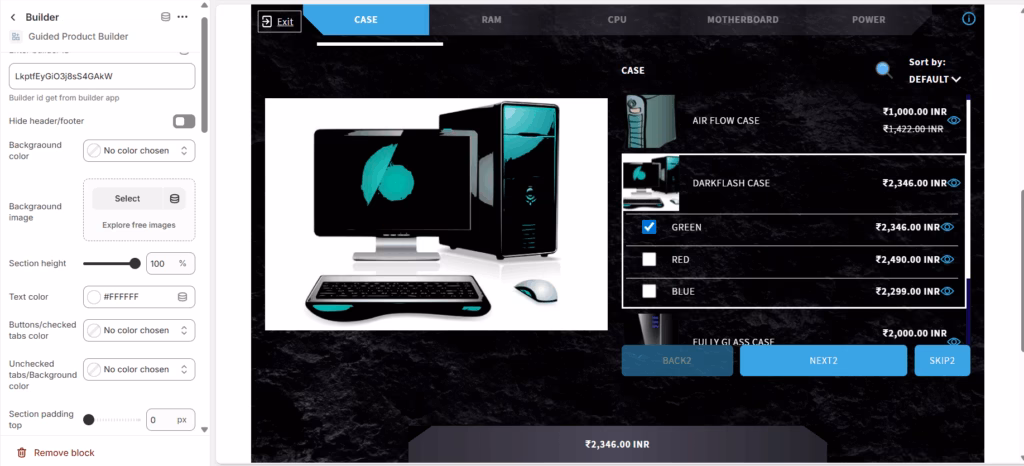
4. Integration with Theme Customization and Interface for Product Selection
- Builder’s Input Field: In Shopify’s theme customization, paste the builder ID into the specified app block.
- Product Configuration: After entering the builder ID, you can configure products and specify quantities.
5. Purchase Flow
- Buy Now Button: Click ‘Buy Now’ after selecting all builder components.
- Redirect to Shopify Checkout: You will be redirected to the Shopify checkout page with all selected products.
core features
- Seamless Component Compatibility
Automatically ensures all selected components are compatible, reducing build errors and user frustration. - All-in-One Build Interface
Create customized product builds on a single, seamless page — no page refreshes. The interface is fast, smooth, and intuitive, providing a streamlined experience for building anything from PCs to apparel bundles, machinery kits, footwear sets, and more. - Flexible Component Management
Add, remove, or reorder parts freely to create the perfect custom setup. - Mobile-Optimized Experience
Enjoy a fully responsive design that makes building any product—whether it’s a custom PC, clothing set, machinery bundle, or shoe configuration—smooth and easy on smartphones and tablets. - Full Shopify Integration
Works flawlessly with all Shopify themes, keeping your store cohesive and professional.
Customization Features
- Admin Style Control
Easily customize the look and feel of the app to match your store branding through the admin panel. - Dynamic Button Texts
All button labels are fully customizable — edit button text to match your tone and branding without touching code. - Downloadable PDF Summary
Users can generate and download a PDF summary of their selected components or product configurations—whether building a PC, customizing clothing, selecting machinery parts, or assembling footwear options. - Branded PDF Exports
Admins can customize the PDF export by adding store logos and additional business information — perfect for quotes and printed builds. - Flexible Redirect Options
Admins can choose where users are redirected after completing a product build—either to the cart page or directly to the checkout. This applies to any product type, whether it’s a custom PC, clothing bundle, machinery kit, or more.
Frequently Asked Questions
How long does it take to develop a Shopify store?
Most projects take 4-6 weeks, but complex stores may take longer depending on customizations and integrations
Do you offer custom Shopify app development?
Yes! We build tailored Shopify apps to enhance store functionality.
Can you migrate my store to Shopify?
Absolutely! We ensure a seamless transition from other platforms.
Do you provide ongoing Shopify support?
Yes! We offer maintenance and support to keep your store running smoothly.
How do you optimize Shopify stores for better conversions?
We focus on UX/UI improvements, fast load times, SEO, and mobile optimization.
Our global clients